|
by Steve McManus |
||||||||||||||||||
|
Review
|
||||||||||||||||||
|
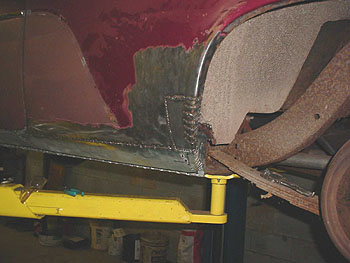
The pictures shown here depict the best shot of the work described earlier, but taken from either side of the car. Sometimes I would get carried away with the project and forget to take a picture of a key process on one side. I should also point out that I did one side at a time. I didnt cut anything away from the right side until the left side was finished. This way I could refer to right side while duplicating the left side. This was very important around the rockers because some of the metal was completely rusted away. The quarter panel forward of the wheel opening has a simple curve from top to bottom tapering inward. From the quarter panel in front of the rear wheel opening, the wheel opening lip first flares out, then back almost parallel with the side of the car, then into the wheel opening. The slits around the radius of the wheel opening were cut about every ¾ inch starting at the forward point of the compound curve of the wheel lip. The fingers of metal were then bent slowly into shape replicating the wheel lip. Much time was spent looking at the other side for reference. As it took shape, the fingers forming the lip were slowly welded together from front to aft. This was a tedious process but the results were pleasing. Once the welding was finished, it looked like this and it is incredibly solid. (figure 1)
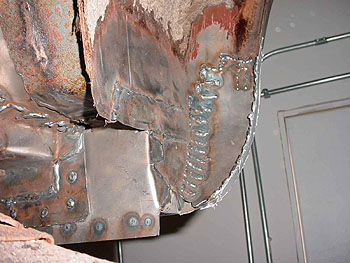
The remaining bits of the fingers were cut off to form the inside edge of the wheel opening lip. The air cut off tool was used to grind away the weld leaving a patch that will require a minimal amount of filler.
To finish off the aft end of the rocker, the inner fender was patched. Since it is out of sight, beauty was not of important to me, so it was a fun and easy project. A patch was cut and fit. Fingers and darts were cut along the edges to mate with the original inner fender, the rear rocker closure, and the inside of the new wheel opening. The patch was tapped into place and welded solid. No grinding required!
That Fender Mount
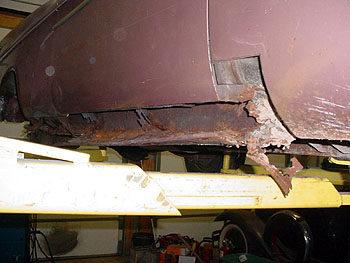
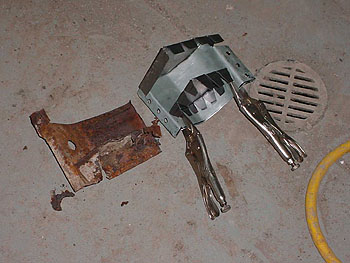
Time to finish off the front of the rocker panels. The original rocker stamping included the front fender mount. Sadly, the replacement rockers did not. There was very little remaining of the original fender mounts so something had to be cobbled together to hold the lower aft end of the fender in place. Here we see what remained of the right fender mount. Hmmmmm, not much? Note that I hacked away the rotted aft lower corners of the front fenders to gain access.
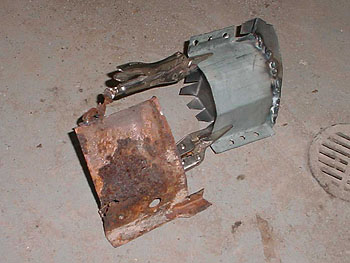
Since I had little to go off of, I used the trial and error method and what remained of the left fender mount as a pattern. After some head scratching and 3 different prototypes, this is what developed. I welded this one together which made it impossible to install on the car, so more cutting and bending and swearing.
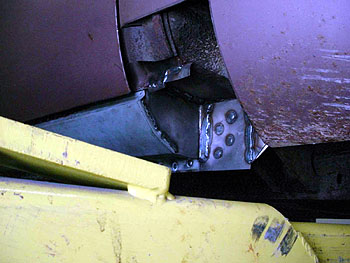
The design was good so another one was hammered out of 20 gauge steel minus the welding. Here it is clamped together for a test fit. Note the forward bulkhead metal also serves as a doubler where the front fender bolts to it in the cavity formed at the front of the mount (closest to the vise grips in this picture.)
The smart way to do this is to fab up the mount and carefully fit it to the car before welding anything. Then weld the front of the rocker closed with the rear vertical bulkhead portion of the fender mount.
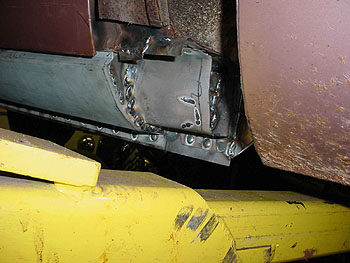
It would also be smart to weld the forward bulkhead in place on the car, then weld the outer portion of the mount to the bulkheads using plug welds on the forward bulkhead and lap welds at the rear bulkhead. I wasnt that smart yet, so I welded the forward vertical bulkhead onto the fender mount and then welded the fender mount to the front of the rocker, the underside of the sill, and to the inner rocker panel. It may not be pretty, but it will hold the fender in place and is out of sight. The holes for the front fender bolts will have to wait until the fenders are repaired.
When the rockers were finished, I knew the rust was licked! Basically the entire car body below the doors and floors had been replaced. Very little All Metal filler was required to smooth out the steel patches. It is sound and solid and very satisfying to look at.
|
||||||||||||||||||