|
by Steve McManus |
||||||||||||||||||||||||||||||
|
Rocker Panels
|
||||||||||||||||||||||||||||||
|
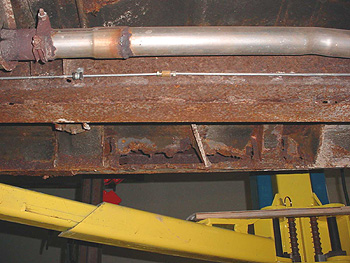
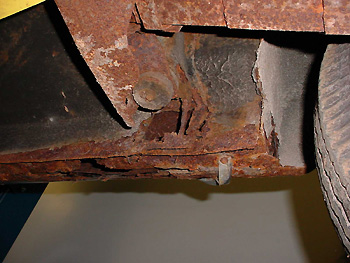
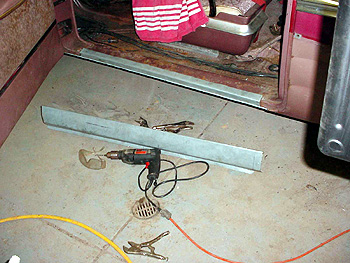
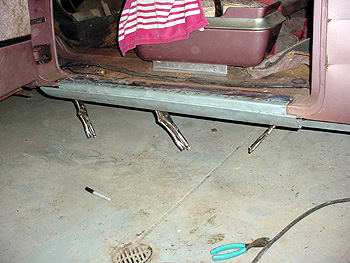
Barney's rear quarters might be solid now, but this project is only getting started. The project moves forward to the area between the wheel wells, the rocker panels. This area has serious rust. The view from the outside (figure 1) is bad enough, but take a look at the inner rocker. (figure 2) To repair this properly is going to be a major project. I decided to start on the left side of the car and to keep the right side intact for reference.
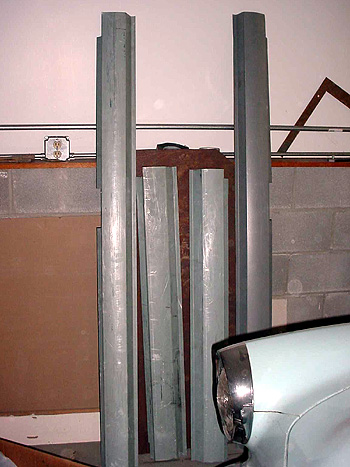
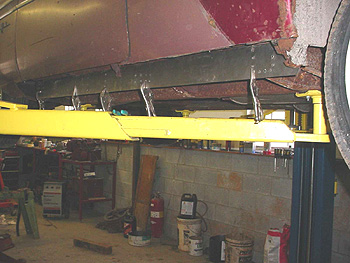
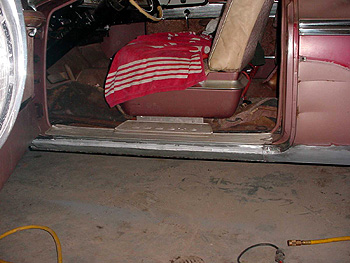
I have some reproduction rocker panels. (figure 3) There is a set for a two door and a set for a sedan. I figured I could use the sedan rockers to patch the area aft of the doors. When determining where to cut off the old metal, the size of these replacement rockers was used as a guide.
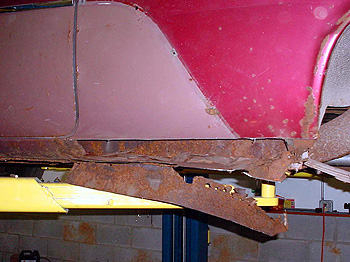
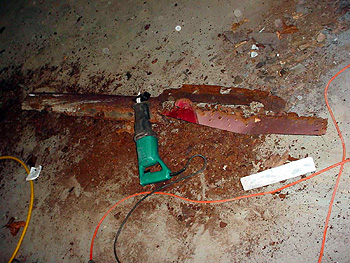
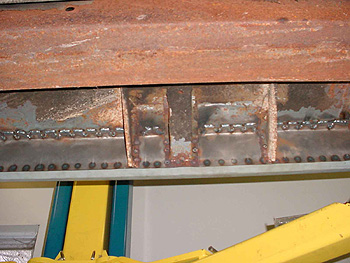
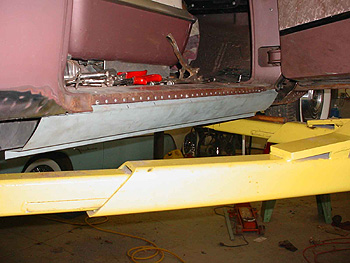
The area to be cut away was marked and the fun began. The air-cut-off tool and Sawzall were used. I prefer the air-cut-off tool wherever possible. With practice, it is easy to control and it makes accurate cuts. Sometimes it won't fit into the spot needing cutting, so the Sawzall helps. The Sawzall is powerful and can put a hurting on you, so make sure you know how to use it. I learned this through the school of cuts and bruises. I cut into the aft portion of the rocker and opened up a real can of worms, iron worms! (figure 4)
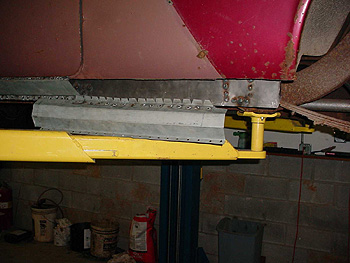
At this point I discovered that there were outer rockers, inner rockers, and middle rockers. All of them needed replacing. There was so little left of the middle rocker that it's not immediately recognizable. Look at that flap of ferric oxide between the inner and outer rockers; there it is. Originally, the two-door rocker panel extended from the front fender mount, all the way to the rear wheel well. It was welded to the "inner rocker" on the bottom and to the floor on the top. At the back end of the door, the rocker became the middle rocker as it was covered with the body qtr panel skin aft of the door. The door sill is the top of the original rocker stamping. To confuse matters further, the inner rocker is really the outer edge of the floor bent down at a 90 degree angle. After more cutting this is what it looked like with the inner rocker still in place. (figure 5)
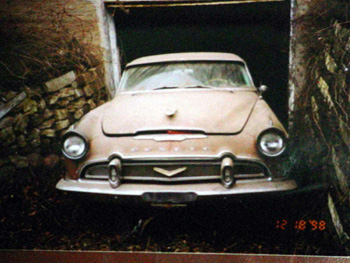
Wow! Thats rusty. What happened to Barney? Howd he get so rusty? When he was traded-in back in 1964, he was parked in the basement of the Bayport Garage. It was a dark and damp place. I always knew there was some rust, but I never imagined how bad it had become. Here is what he looked like when he was liberated from his 34 years of confinement. (figure 6) This picture was taken right before he headed south to his new home high atop Poverty Ridge.
With the outer rocker cut away, I used the Sawzall and chisel to separate the remains of the outer and middle rocker from the inner rocker. This gave me a clear view of the so-called inner rocker. At this point I determined that the inner rocker is the bent down outer edge of the floor pan. Just above the inner rocker, the floor pan is spot welded to the sill (top of the original rocker panel) for the entire length of the inner rocker. The inner rocker is also welded to several frame mounts and the forward and aft body mounts. After examining the floors and finding them sound, I separated the inner rocker with a chisel from the floor at the point where it turns 90 degrees downward. This is just outward from the weld between the floor and the sill leaving the floor and sills intact. Due to the extreme deterioration of the inner rocker, it was easily removed from the frame and body mounts with a chisel. I ground the frame mounts clean of the remains.
Sadly, I discovered that the forward body mount was rusted beyond repair. On closer inspection, the floor immediately above the forward body mount was also rusted out. In a cold sweat, I looked at the right side and found that the forward and aft body mounts were rusted out along with the floor above them. These body mount repairs must be completed before going any further with the rocker panel repair. The body mount repair will be covered here later.
I measured a strip of 20 gauge sheet metal to replace the inner rocker. I started with a blank 78 inches long and 5 inches wide. The inner rocker is only 4 inches tall so 1 inch was marked off and bent over 90 degrees to weld to the original floors towards the middle of the car. I cut tabs on the bent edge to ease the bending, welding, and to give wiggle room when mating the inner rocker to the floor. TIP: If your car needs inner rockers, cut them from a fresh 4 X 8 sheet of 20 gauge along the edges of the long axis BEFORE using the sheet metal for other projects. Use the clean edges for the bottom edge of the inner rockers to achieve that factory look.
The areas where the new inner rockers mate with the floor, body mounts, and frame mounts needed to be cleaned. Barney has a layer of undercoating inside and out that ranges from none to over a half inch thick. This stuff is flammable. It comes off more easily in some places than others. An old wood chisel is handy in scraping it off. Those recalcitrant patches can be wiped with solvent to help loosen them up. Gasoline dissolves this stuff readily but I prefer to use mineral spirits. Spirits is much safer and less volatile so it soaks-in rather than evaporates. After the solvent does its work, the undercoating comes off easily. I ground the mounts and wire brushed the floors clean where I needed to weld. Before starting to weld, the floor mats, carpet, carpet padding, and any wires nearby had to be moved away. Accidentally, I discovered that the original carpet backing is very flammable! No harm done. Notice the holes drilled in the above picture for the plug welds. It is much easier to drill these holes before tack welding the inner rockers into place. Once the fit is satisfactory, clamp the inner rockers into place and start welding. First plug weld the inner rocker to the mounts, then weld the tabs to the bottom of the floor. Keep the fit tight between the metal while welding and tap with hammer and punch as needed. When welding the tabs to the floor, keep the door propped open so you can douse any flames that erupt.
Some words about patch panels. I have used some repro panels for VW and Porsche that were perfect fits. I was disappointed with the DeSoto rear quarter patch panels because they were too short. The NOS rocker panels were also quite disappointing. As previously mentioned, the original rockers were a single stamping that included the front fender mounts and ran all the way to the rear wheel opening. They encompassed the entire sill and rocker from the floor inside the door opening to the bottom of the inner rocker. The replacement rockers are only a patch that covers the area from aft of the front fender mount to the rear of the door opening and from the top of the sill to the bottom of the inner rocker. Since Barneys rust extended beyond the visible areas of the rockers, these replacement rockers left a lot of work to be done and, therefore; they left a lot to be desired. Since the replacement rockers did include the first couple inches of the sill, I decided to cut the old left rocker on the sill where the seam would be hidden by the step plate. Big mistake! While test fitting the new rocker, it was obvious that the distance between the door opening and the sill was significantly greater than on the original rocker. This created an unacceptable gap between the bottom of the door and the door opening lip on the rocker panel. To remedy this problem, I cut the new rocker apart and welded the top part to the sill. (figure 11)
With the sill welded to the replacement rocker top bit, several hours were spent carefully trimming the lower part of the new rocker to achieve a decent fit.
With a good fit between the top and bottom parts of the new rocker panel, I plug welded the lower edge of the new rocker to the new inner rocker. Then I started butt welding the top and bottom parts of the rocker together. I had a lot of trouble welding these things together. The new rockers were galvanized and burn through easily. It also seems they arent quite as thick as they were advertised to be. So a lot of grinding and rework was required to get a presentable joint. When the welding was over, I worked Metal to Metal filler along the seam and it looked OK. (figure 13)
Because of the problems encountered on the left side rocker, a different approach was taken with the right side. The sills (tops of the original rockers) were solid. On the right side I cut the old rocker on the vertical face below the sill and just above the door opening lip. Then I cut the top part of the new rocker off just below where it bends over the sill. This gave me leeway to trim the panels and achieve a very nice gap. I lapped the new rocker under the old at this point so I could plug weld them together. This prevented problems as experienced welding the butt joint attempted on the left side. Even if the sill was rusty, I would still recommend this technique. In that case, fab up a new sill patch, weld it in, then continue with the rocker.
When the original rockers were cut away, I was mystified by the hidden middle rocker. Why was it there and what did it support? As it turned out, this middle rocker was actually a continuation of the original one piece rocker aft of the door. It was covered by the quarter panel sheet metal starting a bit forward of the aft edge of the door opening. I gave thought to omitting it, but figured the engineers must have known what they were doing. On the other hand, the middle rockers had mostly dissolved years ago and the car didnt seem to mind at all. Upon further examination, it appears that these middle rockers serve to support the rear inner body along with the weight of the power window regulators, arm rests, and glass, so I decided to make some up. I used some of the extra bits of the sedan replacement rocker and came up with this. (figure 15)
The holes for the plug welds to the bottom of the new inner rocker are drilled from the inside of the panel. This saves some time because there is no need to de burr the holes for a tight fit. These plug welds are spaced about an inch apart and look similar to the original spot welds. The top part of the middle rocker bent to mate with the bottom of the sill (which was actually part of the original rocker stamping.) Rust was cleaned from the old metal with the wire brush. After test fitting, the top edge of the middle rocker was plug welded to its bottom part. Then the assembly was clamped and welded into place on the car. |
||||||||||||||||||||||||||||||